TL;DR
1. Sign Up for Free and Get Started
Head over to https://app.aifluencerpro.com/register to create your free account. Don’t worry, it's quick, and you’ll receive free credits upon signing up to get you started.
2. Complete the Onboarding Tutorial
After signing up, follow the short tutorial to familiarize yourself with the platform. It will walk you through the basics and ensure you’re ready to create amazing AI-generated influencers.
3. Access the Magic Studio
Once you're done with the tutorial, navigate tohttps://app.aifluencerpro.com/studio/generate-spicey. This is where all the magic happens! In this studio, you’ll begin creating your photorealistic AI influencers.
4. Type Your Prompt and Adjust Advanced Settings
Now, let’s craft the perfect prompt! Type in a detailed description of the influencer you want to generate. You can adjust advanced settings like facial features, styling, and more to fine-tune your creation.
5. Generate and Reveal Your Photorealistic AI Influencer
Once your prompt and settings are all set, hit the generate button and watch the AI bring your influencer to life. In just moments, you’ll have a stunning, photorealistic image ready for use!
Introduction
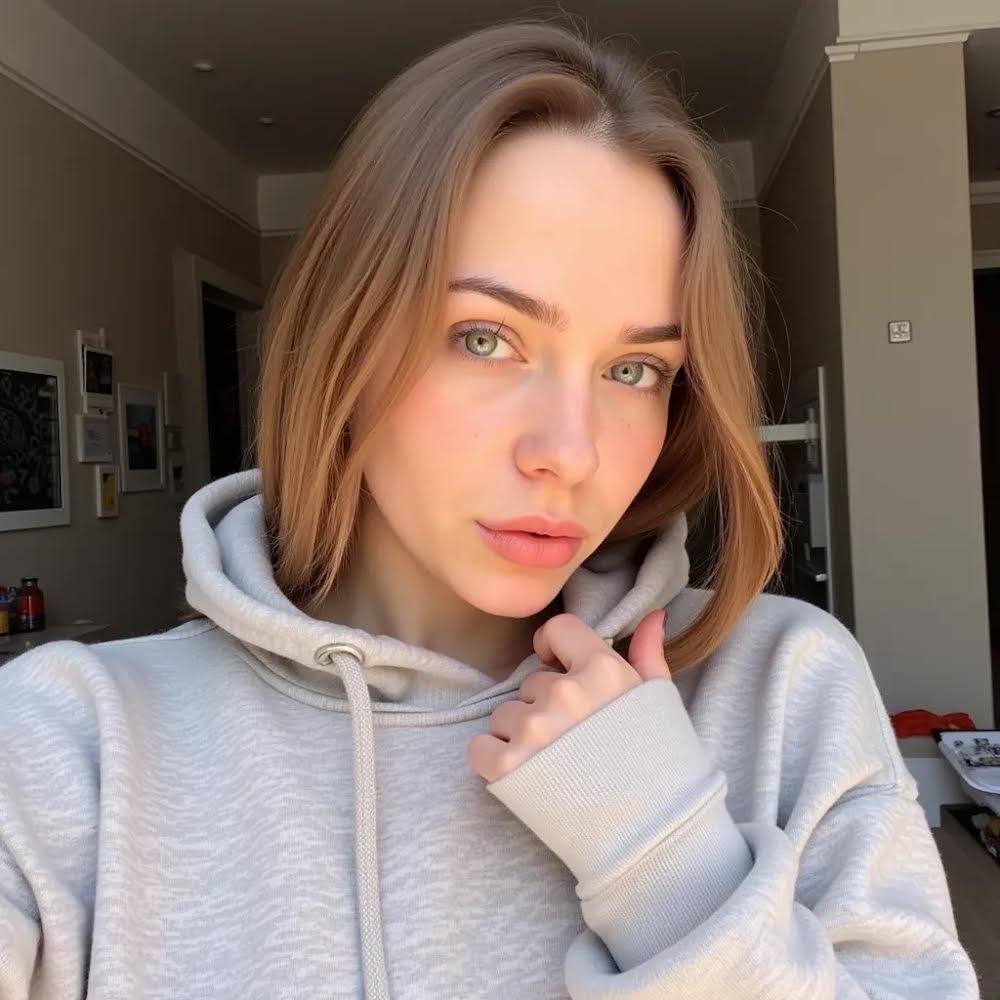
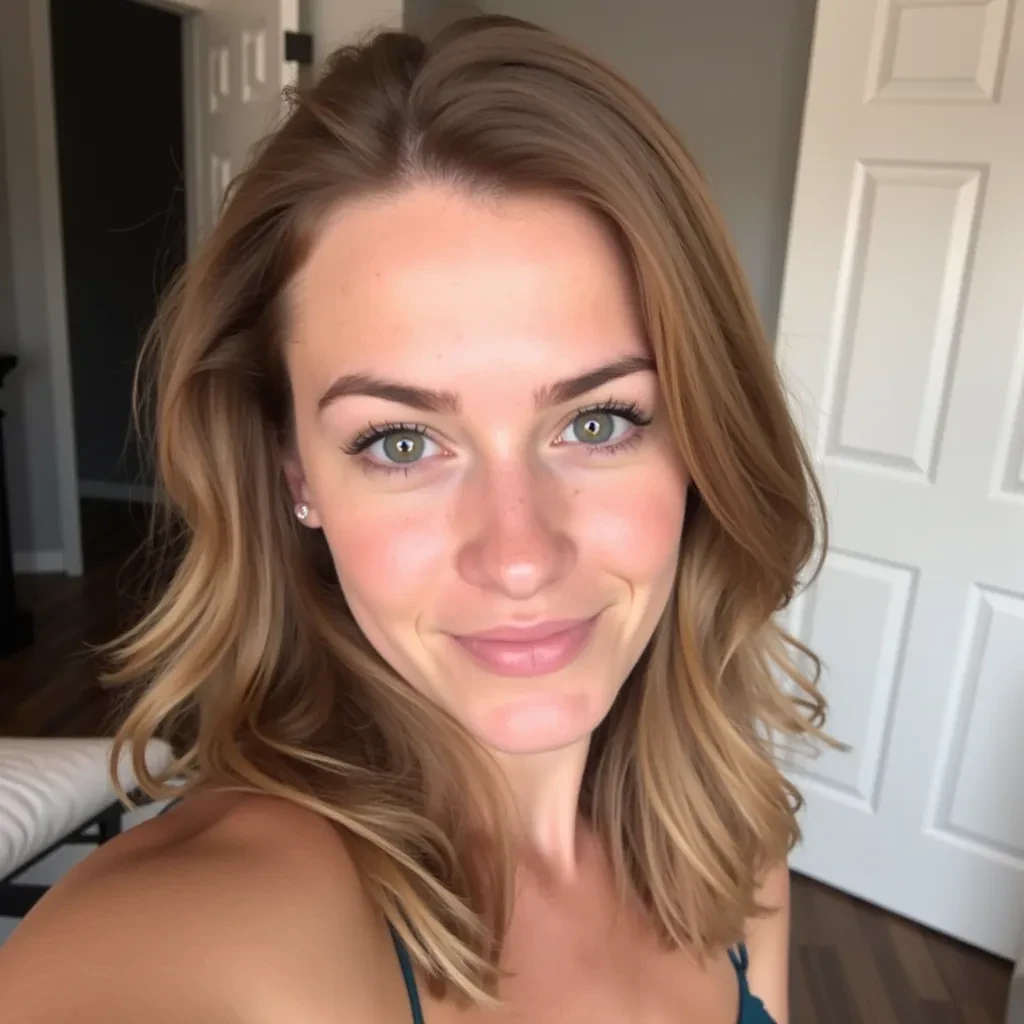
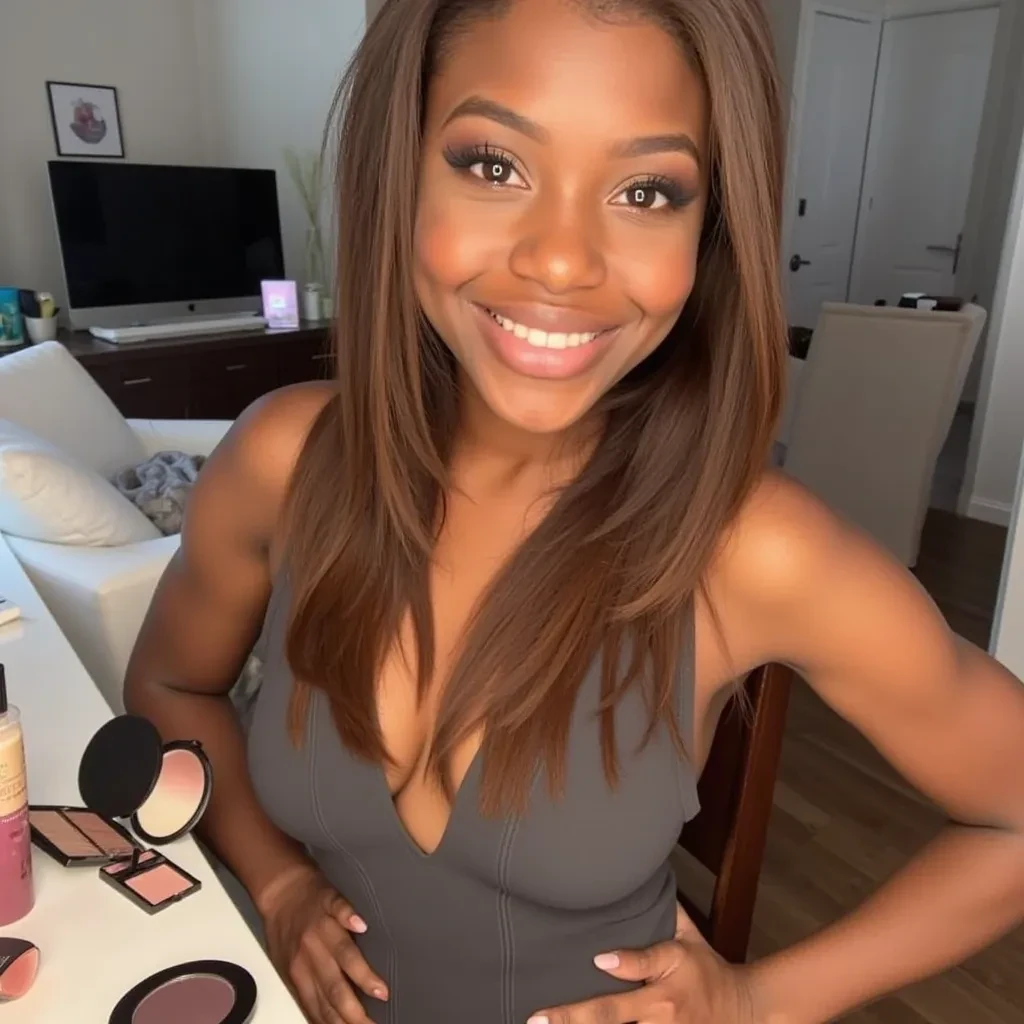
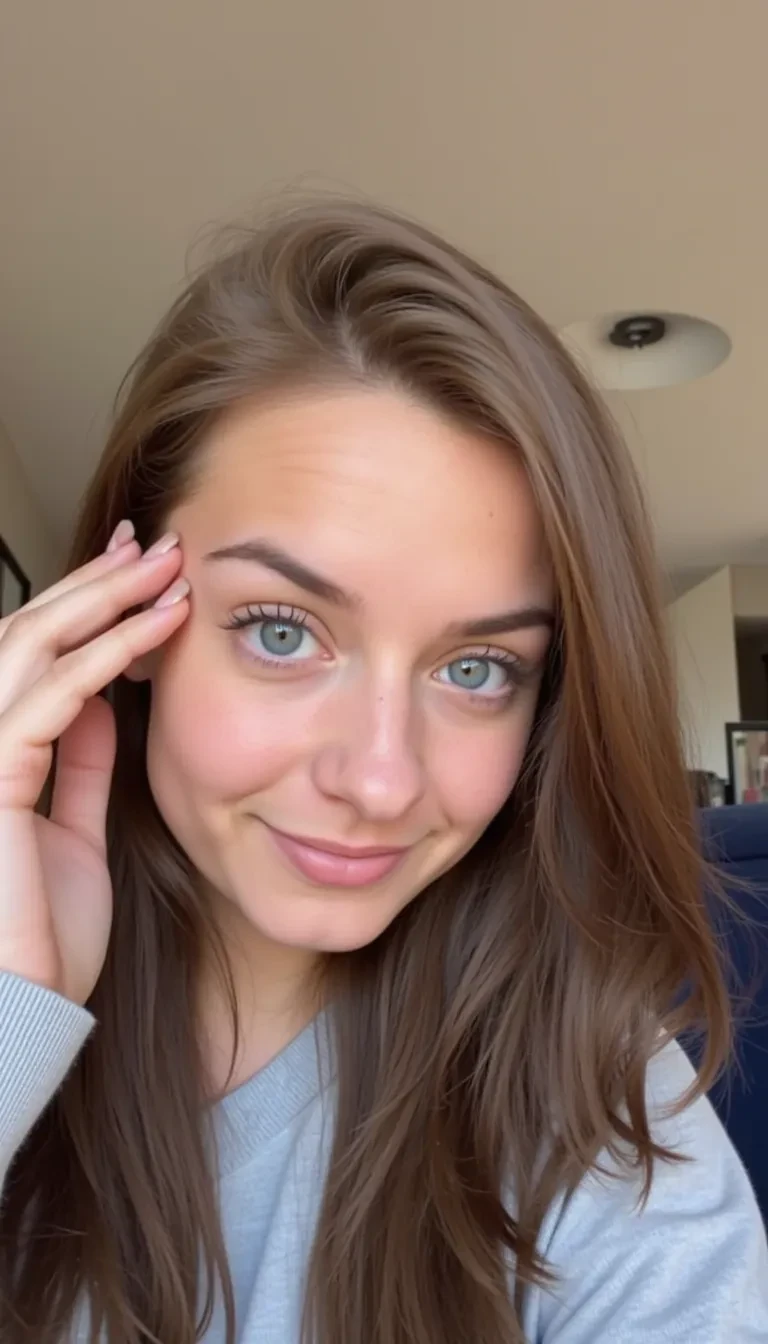
In today's digital world, AI technology has evolved to the point where creating hyper-realistic influencers is not only possible but easier than ever. Whether you're a content creator, marketer, or just curious about AI's creative capabilities, learning how to generate lifelike virtual personalities can revolutionize your approach to digital content. In this guide, we'll walk you through the step-by-step process of using AI to craft stunning, photorealistic images that can be used for social media, advertising, or personal projects. With just a few clicks, you’ll be able to generate highly convincing influencers that look just like real people. To give you an idea of what you'll be able to create, take a look at these examples generated entirely by AI:
By the end of this guide, you’ll be equipped with the tools and techniques to bring your own digital influencers to life—seamlessly blending the boundaries between reality and artificial intelligence. Let's dive in!
Sign Up for Free and Get Started
To begin your journey in creating photorealistic AI influencers, the first step is to sign up for a free account. Head over to https://app.aifluencerpro.com/register and fill in your details. Make sure to use a real email address during the registration process, as you’ll need to verify your account before proceeding. Once you've entered your information, check your inbox for the verification email. Click the link provided to confirm your account and unlock your free credits, which can be used to start generating AI influencers right away. Don’t worry—it’s quick and completely free to get started!
Complete the Onboarding Tutorial
Once you’ve signed up and verified your account, you’ll be guided through a short onboarding tutorial. This step takes less than a minute and is designed to help you get familiar with the platform. The best part? The tutorial auto-selects everything you need, so you don’t have to worry about configuring settings just yet. Simply follow the prompts and complete the tutorial to ensure that your account is set up for generating photorealistic AI influencers. After finishing, you’ll be ready to dive into the creative process!
Access the Magic Studio
Now that you’ve completed the onboarding, it’s time to head over to where the magic happens! Navigate to https://app.aifluencerpro.com/studio/generate-spicey, where you’ll begin creating your photorealistic AI influencer. This is the main workspace where you’ll enter prompts, adjust settings, and generate your images. The studio interface is designed to be intuitive, making it easy to bring your vision to life with just a few steps. Here’s what the Magic Studio looks like:
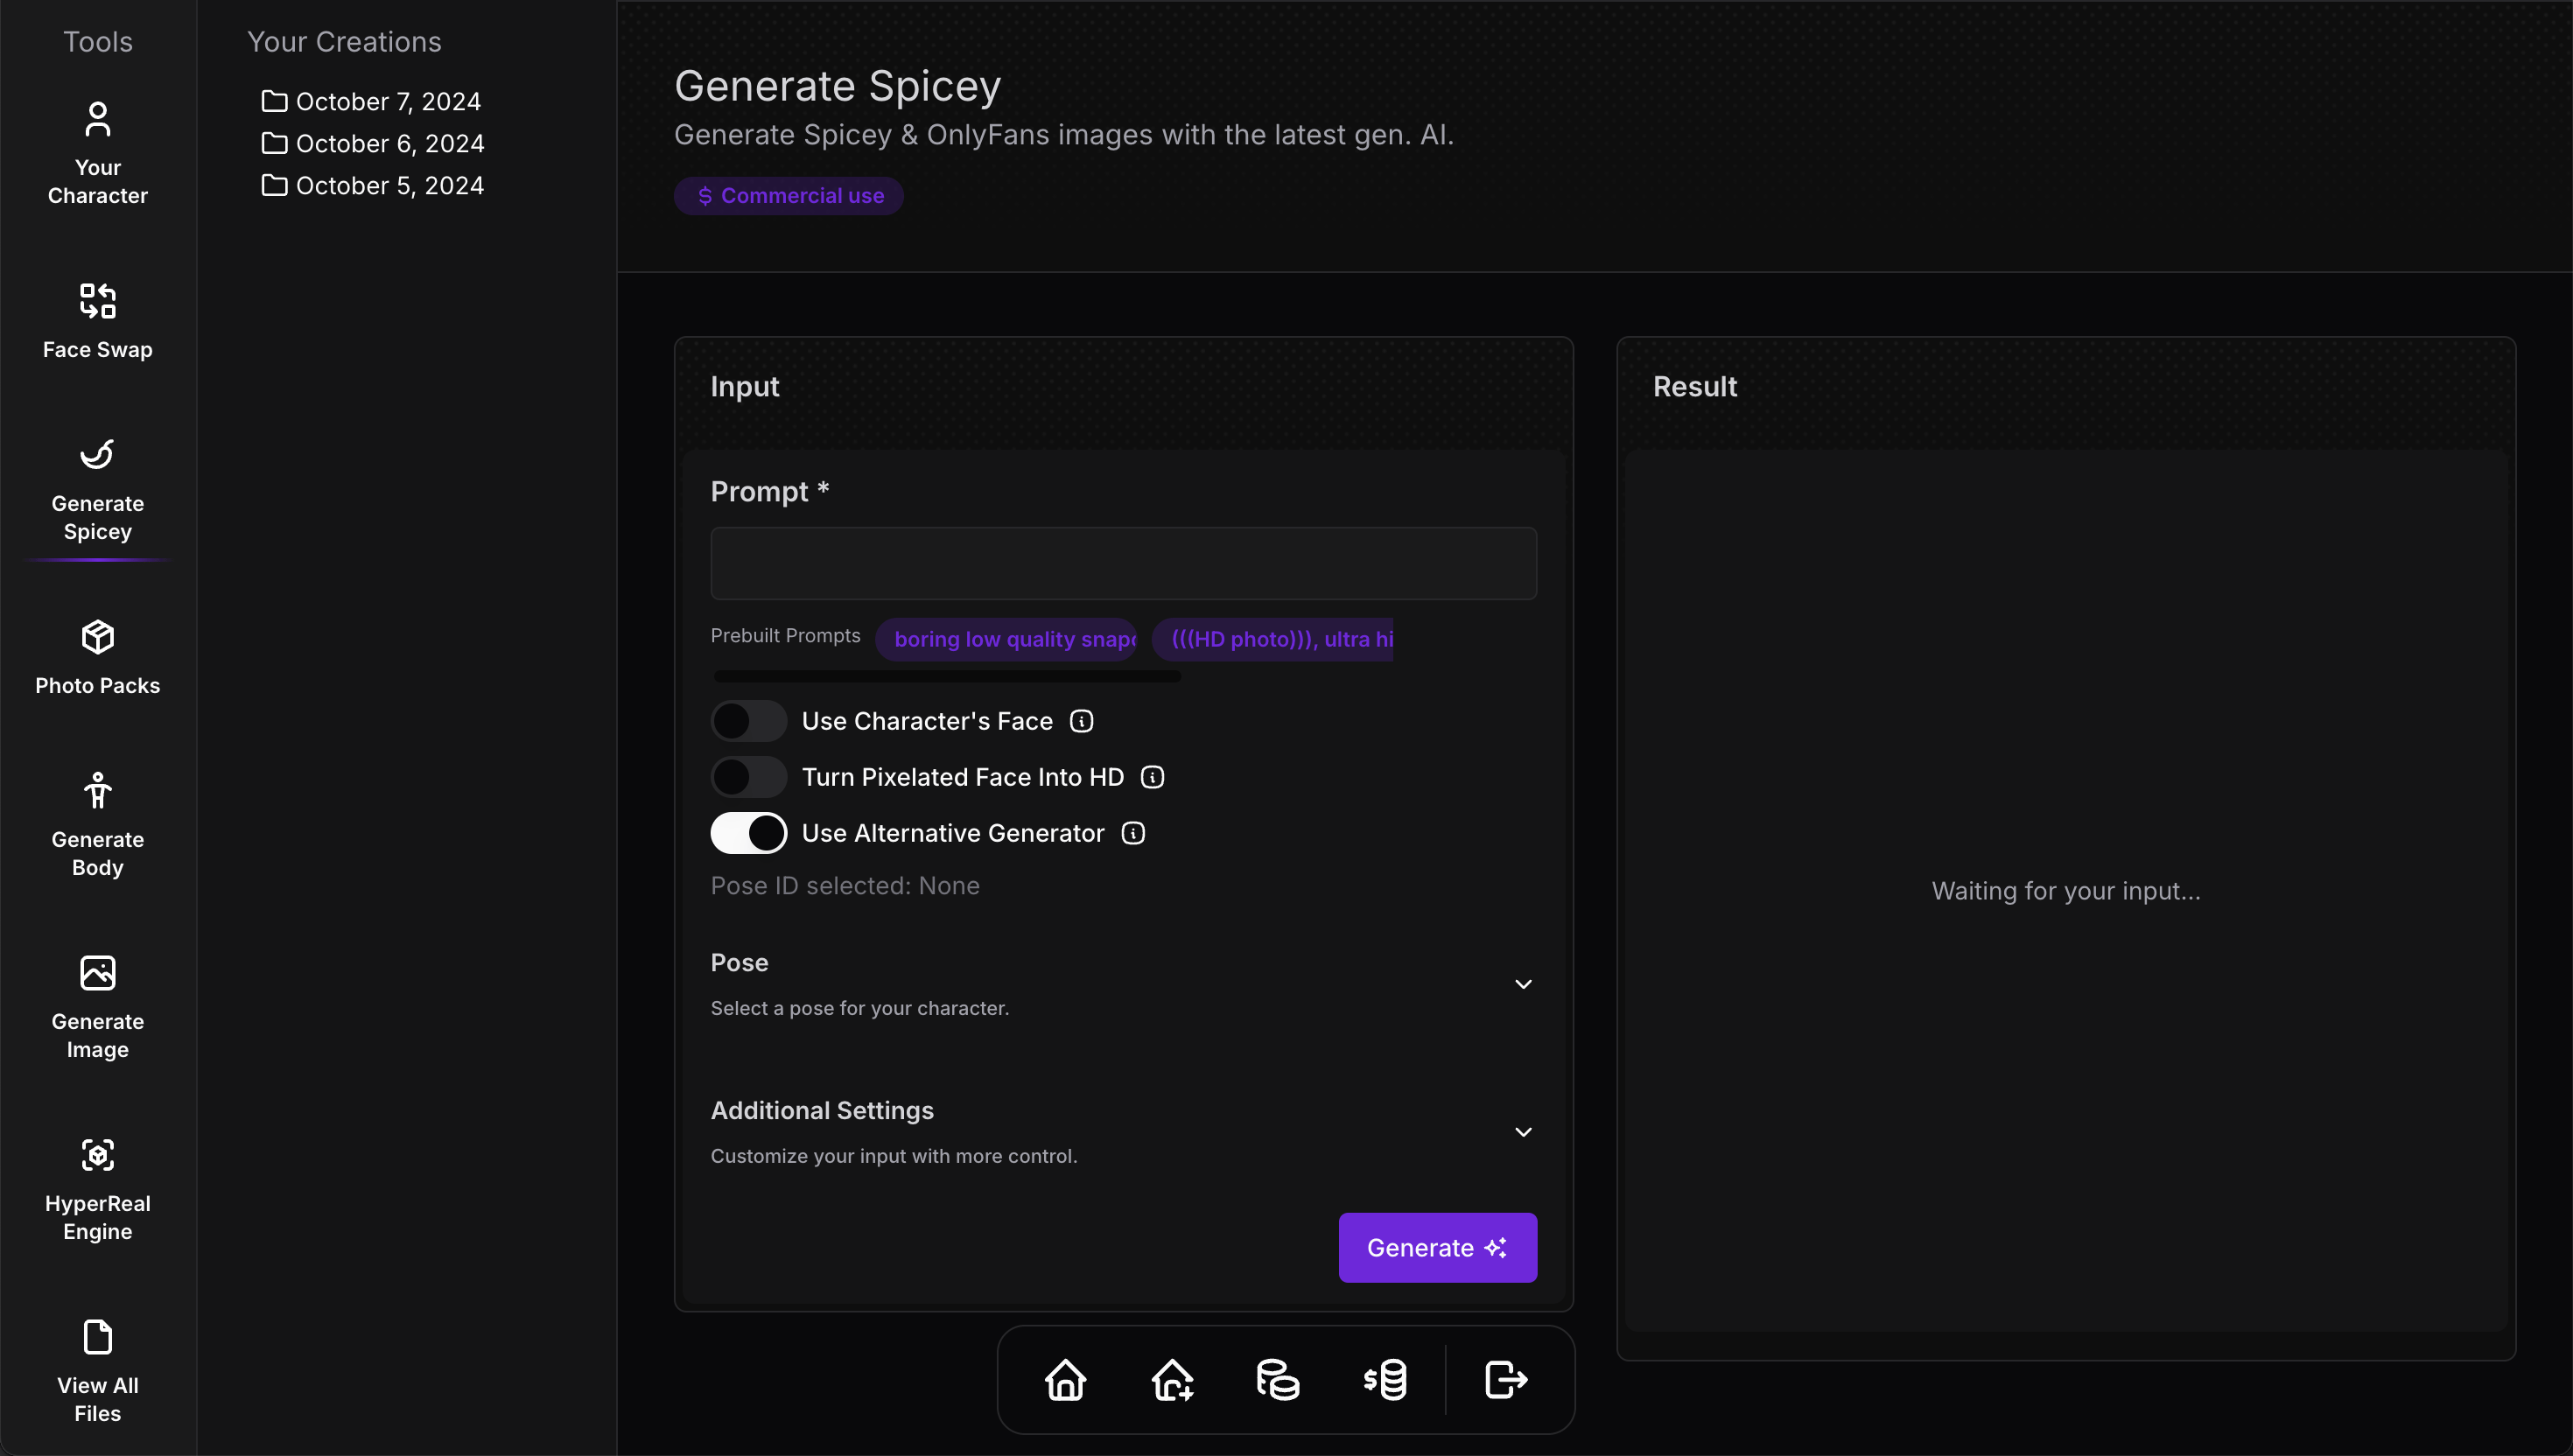
Take a moment to familiarize yourself with the layout. Everything you need is right here, from prompt input to advanced customization options. Once you’re comfortable, it’s time to start creating!
Crafting the Perfect Prompt
To create stunning photorealistic AI influencers, the key is crafting a detailed and imaginative prompt. Surprisingly, using words like "real" or "realism" in your prompt won’t give you the best results. Instead, you’ll want to be more creative and descriptive to mimic real-world photography styles. For example, a prompt like “boring low quality Snapchat photo circa 2015” works incredibly well to create images that feel like they were taken on a phone—complete with imperfections that make the result look more authentic and less polished. This style captures the subtle nuances of early smartphone photography, adding a natural touch to your AI-generated influencer. Try this prompt for a realistic, casual photo:
“boring low quality Snapchat photo circa 2015, cute woman, soft light brown hair, selfie”
By including details like hair color, lighting, and pose (like a selfie), you can further enhance the realism. The more specific and nuanced your prompt, the more lifelike the result will be. Feel free to experiment with different descriptions to match the style you're going for.
Adjusting Advanced Settings
The Magic Studio offers several advanced settings that can significantly impact the quality and realism of your AI-generated images. Here’s a breakdown of each setting and how to use them effectively:
Image Size
You can choose between various image sizes, such as square (1:1) or portrait (9:16). For social media purposes, the portrait (9:16) option is typically the best choice, as it is optimized for platforms like Instagram and TikTok.
Number of Inference Steps
This setting allows you to adjust the number of times the AI will iterate over the image before presenting the final result. The default number is 28 steps. This is similar to how many times the AI will refine its process to generate the perfect image. A range between 20 to 30 steps usually yields the best results, so feel free to experiment within this range.
Guidance Scale
The Guidance Scale determines how closely the AI should adhere to the details in your prompt. The default setting is 3.5, but the ideal range is typically between 2.5 and 4.5. Lower values allow for more creative freedom, while higher values will stick closer to your prompt.
LoRA Scale
This setting indicates how much the AI should consider the additional LoRA (Low-Rank Adaptation) helper. The default is set to automatically add LoRA, but you can adjust this scale between 0.6 and 0.8 for optimal results. If you want to exclude LoRA completely, you can set this to 0. If you're not satisfied with the preset LoRA from the platform, you can also use the generate image tool to create your custom LoRA helper.
Seed
The "Seed" option is a powerful feature for refining images. If you generate an image and notice issues—like poorly rendered hands or legs—but love the overall look, you can input the seed to create a similar image while fixing specific elements. When adjusting, do this one by one. For example, if you want to improve the hands, keep the same prompt and adjust the Guidance Scale by ±0.1, then regenerate the image. This allows you to fine-tune small details without losing the essence of the original creation. By mastering these advanced settings, you can significantly enhance the quality of your AI-generated influencers, tailoring them to meet your creative vision.
Generating Your Photorealistic AI Influencer
Now that you have crafted your prompt and adjusted the advanced settings, it’s time to generate your photorealistic AI influencer! Head over to https://app.aifluencerpro.com/studio/character to create a new character. This is where you’ll set the foundational look and feel of your influencer, allowing for greater consistency in your creations.
The platform features a user-friendly interface that lets you define your character’s facial features and overall appearance. You can easily customize elements such as hair color, skin tone, and facial structure to align with your vision.
ne of the standout features is the simple toggle for face swap. By toggling this feature on during each generation, you ensure that your character maintains the same face across different images, providing a cohesive and recognizable look every time you create. This is particularly useful if you want your influencer to have a consistent identity, making your content feel more polished and professional.
Once you’ve customized your character, you can start generating images based on your prompts. The combination of detailed prompts, advanced settings, and a consistent character design will help you produce stunning, lifelike AI influencers that stand out!
To achieve the most lifelike AI-generated images, consider these valuable tips:
Be Creative with Your Prompts
Using prompts like “boring low quality Snapchat photo circa 2015” helps mimic the natural imperfections found in casual smartphone photography. Experiment with different variations of this prompt to see how subtle changes can influence the outcome. For instance, phrases like “casual selfie taken on an iPhone” can enhance the realism by imitating specific characteristics associated with mobile photography.
Utilize the Alternative Generator
The platform offers a feature to toggle between “Use Alternative Generator.” This can provide varied results, allowing you to explore different rendering styles. Switching this option on and off while experimenting with your prompts can lead to discovering unique and realistic images. Sometimes, one generator may produce a more authentic look than the other.
Adjust and Refine Your Prompts
Don’t hesitate to play around with different descriptive elements in your prompts. Specify details like lighting conditions, the background, and even the emotional tone of the image (e.g., “a joyful woman laughing in a park”). The more context you provide, the better the AI can replicate the essence of a real photograph.
Experiment with Variations
If you find a particular style or prompt that yields good results, try tweaking it slightly. For example, you could change the setting or lighting description to see how it alters the final image. Variations can lead to unexpected and delightful outcomes, so keep experimenting!
By combining these strategies, you’ll be well on your way to generating stunningly realistic AI influencers that capture attention and engage your audience effectively.